Home Sausage Making: Step 4
Stuffing the Casing
For home sausage making, especially for fresh varieties, it isn't a rule that the sausage has to be put into casings. Lots of home made sausage is either left in bulk or made into patties.
If you are going to stuff your sausage though, now is the time to do it.
You'll see some recipes that call for the mixed sausage meat to be aged for a while before it is stuffed (to let the flavors mingle), but I disagree with that approach.
If you mix your meat and spices and then let it sit in the fridge like those recipes recommend, it will set up and become very difficult to work with.
Right now, just after everything is well mixed, is the best time to start stuffing. The meat and spices will meld together in the casing equally as well as if left in bulk to age in the fridge.
Believe me, the stuffing process will be much easier if you do it my way.
Sausage Stuffer
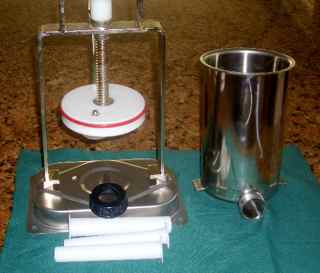
This is the great little 5 pound capacity hand-cranked stuffer I used for this home sausage making session.
It stuffed the whole 7 lb. batch in under 6 minutes, and I even had to stop to refill it once.
The KitchenAid system that I used to grind this batch does have a stuffing attachment, and it does work well. It's just slow
I like to get the stuffing chore done reasonably quickly so that the sausage mixture doesn't start to stiffen up and make the process more difficult than it needs to be.
Also, the faster you get the stuffing job done, the sooner you can get your sausage back into refrigeration (remember those nasty bacteria).
Loading the Sausage Stuffer
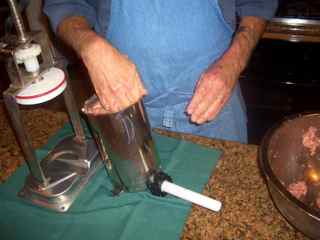
Here I have the stuffing tube attached to the stuffer and have almost filled the meat chamber.
When you fill your sausage stuffer, it's important to try and get out any air pockets in the meat.
Air pockets in the stuffer can cause large bubbles in the stuffed casing. Some are almost inevitable, but fewer are better.
Its also a good idea to lubricate the outside of your stuffing tube before putting the casing onto it. That makes it easier for the casing to feed off the end of the tube.
Use vegetable oil or shortening to lubricate collagen casings and use water for natural casings.
Casing
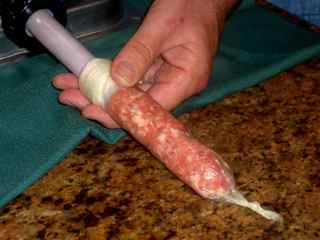
Here's a picture taken just at the beginning of the stuffing process.
You can see the collagen casing on the stuffing tube.
All you do is slide it onto the lubricated tube, pull a small amount out while holding the bulk of the casing on with your hand, and tie a knot in the end.
Stuffing the Casing
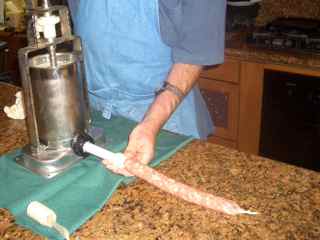
It's actually pretty easy to stuff a batch of sausage.
Hold the casing loosely at the end of the stuffing tube with one hand and let the sausage feed into the casing as you turn the crank with your other hand.
The sausage will pull the casing off of the tube. You just need to control the speed of the whole process.
It's much easier to do than it is to explain. You'll get the hang of it right away.
You may need to stop and refill the stuffer once you get into this home sausage making step (as I did). If that happens, just let the sausage and casing hang on the end of the stuffing tube.
If you run out of casing before you run out of meat, you only need to re-lubricate the stuffing tube and put on another length.
The Completed Sausage
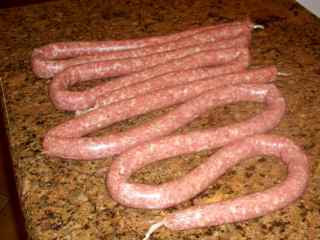
Here's the finished product: Seven pounds of some of the best hot Italian sausage you can imagine.
All that needs to be done is to tie the sausage off into links of what ever size you want.
Unlike natural casing, collagen casing does need to be tied into links because it will unwind itself if it's just twisted instead.
I use cotton butcher string to do the job. Remember to tie twice at the end of each link and cut between the knots.
There you have it: Home sausage making in a nut shell. As you can see, its easy. Be sure and let me know once you have made your first batch.